


For the past few weeks I have been showing various parts of my daughter’s bedroom makeover. I so appreciate everyone who has followed along and shared such encouraging comments. Thank you! So, without further delay, here is the room in its entirety.

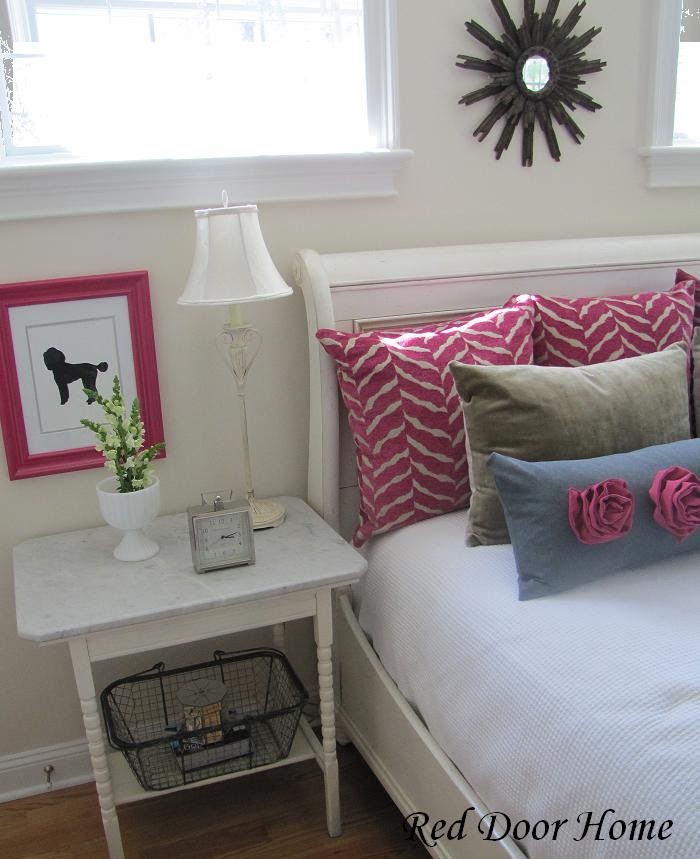
As I have mentioned before, my daughter’s room was decorated around a blue and green Laura Ashley bedding set I used when I was in college.

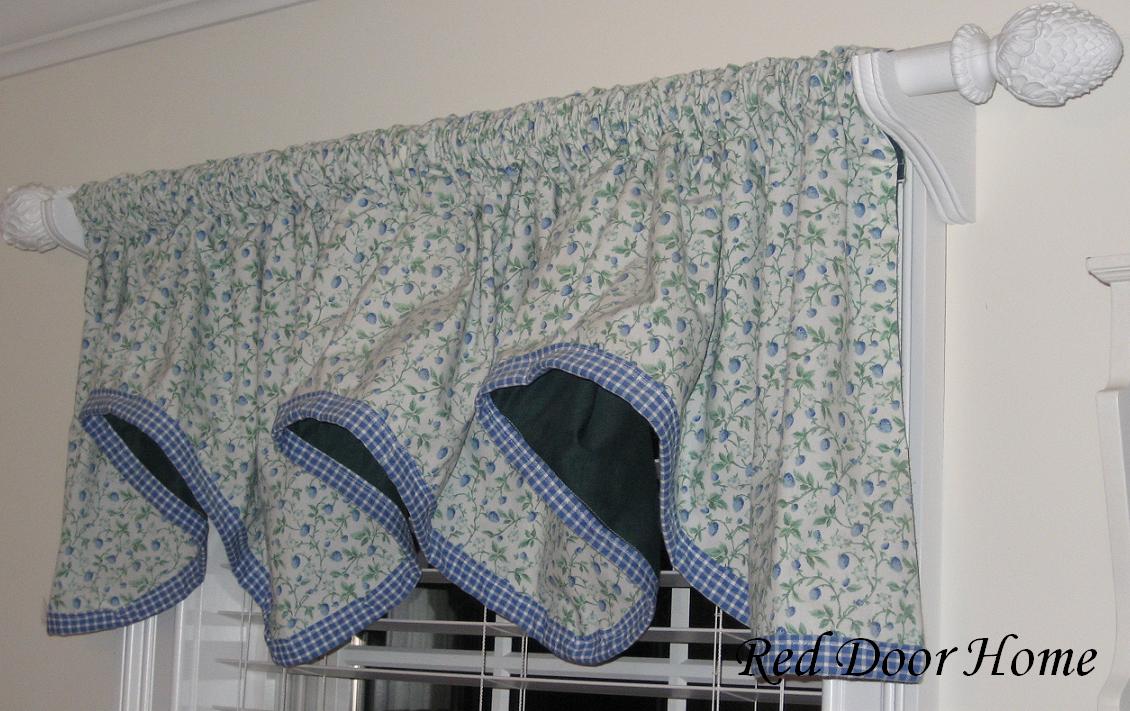

Although my daughter has not reached double digits, she wanted a room where she could make some of the decorating choices. We were not initially on the same page, but through compromise – she wanted pink and dogs and I wanted a space that would fit in with the rest of the house and one she would not out grow in a few years - we were able to create a room we both love. The starting point for the entire project was the curtain fabric.


. . . and accessorized with vintage and yard sale finds.

Unplanned Changes
One of the biggest changes in this room was the flooring. You may have noticed from the before picture, the bedroom was carpeted. Installing hardwood floors was not in the original redo plan. In fact, the room was basically finished when we decided to replace the carpeting. We were at the point where something had to be done - markers, nail polish and lotion just do not work well with white carpet.

So there you have it – my daughter’s room redo! It is hard to believe the entire process started over 8 months ago. Overall, I think we achieved the goals of this project. I am very pleased with the results and most importantly, so is my daughter.
Sources:Bed – Ethan Allen
Dresser – Ethan Allen
Rug – Madeline Weinrib
Dresser lamp – vintage yard sale find
Bedside lamp – repainted brass lamp
Curtain fabric – Calico Corners
Pillow fabric (gray and pink) – JoAnn Fabrics
Pillow fabric (tan velvet) – Calico Corners
White faux fur throw – Home Goods
Sunburst mirror – Wisteria
Upholstered cubes – Target
Upholstered cube slipcover fabric – fabric JoAnn Fabrics
Bulletin Board – Ballard Design
Small Shelf below bulletin board - Target
Linking up to some of my favorite parties.


0 comments:
Post a Comment