I love vintage - whether it be linens, kitchen tools, fabric, graphic prints, clothing, ect. There is something so comforting to me about things that have been around for awhile and things that have a history.
Several weeks back my family and I went to a local farmer's market and stopped at a favorite antique store in the area on our way back. I picked up quite a few vintage hankies as well as some vintage pillowcases. I knew I wanted to turn the pillowcases into dresses, but wasn't quite sure what I was going to do with the hankies.
My good friend, college roommate, and Savannah's Godmother, Lara, just had her birthday this past week and I wanted to make a special gift for a VERY special friend. You know the saying, "Make new friends but keep the old, one is silver and the other's gold?" Well Lara is one of my "old", long-time friends and she is just that - pure gold. She is one of the few people in life that I can be 100% myself and never feel like there is any judgement - I feel as comfortable around her as I do my immediate family. She is very special to me and is without a doubt, what I like to call a "Forever Friend".
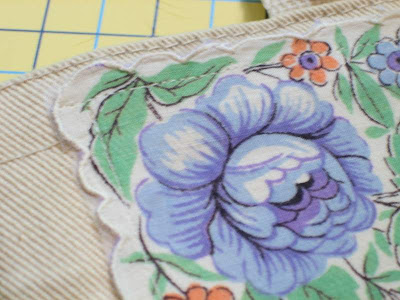
So this is what I came up with for Lara's birthday - the Vintage Hanky Tote. Give it a try - make one for yourself or give this as a gift to that special forever friend in your life.
Vintage Hanky Tote Tutorial
Supplies:
1 medium size canvas tote
1 vintage hanky
Double-sided fusible interfacing (I used Steam-a-Seam Lite)
Fabric for tote lining (approx. 1/4 yard)
Trim (for bag straps)
1 large button
1 elastic hair-tie
Sewing Machine
Hand-sewing needle
Iron
Directions:
Start with a basic canvas tote. I purchased mine at our local Joann's, but I know you can get them many other places, such as Michael's.
Measure the length of your straps and cut your trim accordingly. You can use ribbon, rick-rack or whatever trim you like.
Stitch your trim to each one of the bag straps.
This is what your trim will look like after you have stitched it to both of the bag straps.
Now you will need to apply your double-sided fusible interfacing to the vintage hanky.
Press your hanky to remove any wrinkles or creases.
Apply your double-sided fusible according to your package directions. Apply to the back-side of the hanky.
Now "fuse" (iron) your hanky to the front side of your canvas tote.
After you have ironed your hanky to the tote, stitch around the entire perimeter of the tote to permanently secure the hanky. Do this leaving approximately a 1/2" seam allowance.
This is what your tote will look like after you have stitched down your hanky.
Now if you have fun clothing labels, it is time to add this before we do the lining. Place your label on the back-side of the tote between both of the straps. Adding a personal label to handmade items is so much fun! Even if you don't have a business, I highly recommend ordering some personal labels - you will feel so proud seeing your name on something you have made.
Stitch your label in place with coordinating thread.
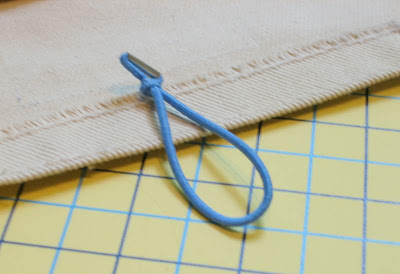
Now take your elastic hair-tie and tie a knot towards one-side.
Place your hair-tie on the inside of the back-side between both of the straps. Place the knot a little bit lower than where you anticipate sewing in your lining (we don't want the knot to show). Stitch in place - sew back and forth several times to ensure a strong hold.
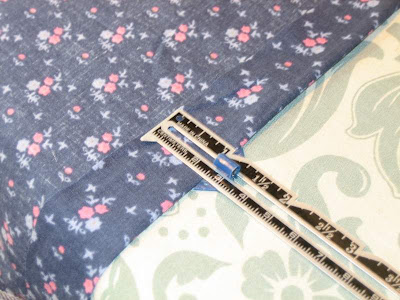
Now for the tote lining. Place the bottom of your tote on the fold of the lining fabric (the fold will be the bottom of the lining). Using your tote as your guide, cut around the tote, allowing for a 1/2" seam allowance on the three sides (top and both sides).
Now stitch both sides together. Place fabric, right-sides together and stitch (1/2" seam allowance). I used my serger, just because it is faster - it doesn't make a difference which machine you use. So now both sides are stitched together, the bottom is the fold from the fabric and the top is open.
Fold down the top 1" all the way around and press.
It's hard to tell from the picture, but the fold is with the wrong-sides together.
Now turn your lining, RIGHT-side out and your tote INSIDE-out. Pin your lining to the top of the tote bag.
Stitch around the top of the lining. Make sure to use a light-colored bobbin thread for this part because it will show on the outside of the tote. If you want to be really fancy, you can hand-sew the lining into the tote.
Here is the lining sewn into the tote. As you can see, you can no longer see the little knot from the hair-tie, it looks neat and tidy!
Now sew whatever large button you have chosen to the front of the tote bag. I chose to do a fabric covered button with matching lining fabric. I find fabric covered buttons lend a vintage flair, so I thought that was perfect (and I'm kind of obsessed......you should see the jars I have of these!). But use any button you have or like.
And there you have it - a lovely, timeless vintage tote, for a lovely, lovely forever friend!
Happy Birthday Lara!
Thanks for being such a great friend!


0 comments:
Post a Comment