In case you missed my tutorial in Delish Magazine, I wanted to share my Laptop / Kindle/ I-Pad Sleeve Tutoiral with you. Gift giving season just around the corner and what better way to show someone you care than with a custom laptop sleeve.
This pattern can be made for any size laptop, Kindle, or I-Pad by adjusting the measurements accordingly. I used girly fabric here, but you could definitely make this more "manly" by using a more masculine print or perhaps even some wool suiting material.
Supplies:
Cotton fabric for exterior
Fleece fabric for lining
2 buttons
Sewing machine
Seam-ripper
Thread
Iron
Ironing board
Fray Check (optional)
Fabric marking pen, chalk or pencil
Instructions:
1. Gather your supplies.
2. Determine the sizing for your laptop sleeve. First, measure the height of your laptop.
3. Next measure the length.
4. Finally measure the width.
Once you have these measurements you can determine your pattern size. Here is how you calculate your dimensions for the large fabric pieces (interior and exterior): (L + H + 1) X (W + H + 1). For example, my laptop was 9 inches wide (W), 12.75 inches long (L), and 1.25 inches tall (H), so my calculation was (12.75 + 1.25 + 1) X (9 + 1.25 + 1) = 15 X 11.25. I cut my interior and exterior fabric pieces 15" X 11.25" (4 pieces total).
5. For the straps, draw a pattern for yourself (freehand) on a piece of paper and use this as a template. These straps are 2.5 inches wide by 7.5 inches tall (up to the very top of the curve). Cut two from the exterior fabric and two from the fleece (lining). Place exterior fabric right-side down on top of your lining (fleece).
6. Stitch along both long sides and the curved top, leaving the bottom open (1/4" seam allowance).
7. Here are both of your straps after stitching them together.
8. Trim the excess fabric off around the curve. This will help it to lay nice and flat.
9. Turn both straps right-side out.
10. Press with a hot iron.
11. Here are both straps after pressing.
12. Top-stitch on both long sides and the curved top (1/8" seam allowance). Do this in a coordinating thread.
13. Here are both straps after top-stitching.
14. Attach the button hole foot to your sewing machine.
15. Prepare to sew a button hole in each strap (according to your machines directions). Start button hole 1/2" from the end of the strap. Make it as big or as small as you need, depending on the buttons you have chosen to use.
16. Here is the completed button hole.
17. Now it's time to open both button holes.
18. Take your seam-ripper and open the inside of both button holes.
19. Use Fray Check on each button hole after opening. This is entirely optional, but it really helps to prevent any additional fraying.
20. Pin both sides of your exterior fabric right-sides together. Pin the two long sides and one short side.
21. Stitch all three sides (1/2" seam allowance)
22. Here is your exterior fabric after sewing all three sides.
23. It is important to remove the extra fabric in the two corners.
24. Clip both corners to remove any extra bulk from the fabric.
25. Turn right-side out and press.
26. Pin the straps into place. Line up the raw edge of the strap with the raw edge of the exterior fabric. Measure in approximately 1.5" on each side.
27. Baste straps into place. Set machine stitch length to 3.5 and stitch along the edge (1/4" seam allowance).
28. Pin both long sides of fleece (lining) together.
29. Stitch down both long sides (1/2" seam allowance). Stitch part of one short-side together, but leave an opening in the middle.
30. Make sure to only stitch in about 1/3 of the way on the short side of the fleece. The opening needs to be in the middle for you to be able to turn the laptop sleeve later. Clip the corners to remove bulk.
31. Feed the exterior fabric in through the hole in the fleece.
32. Line up the raw edge of the exterior fabric and the raw edge of the fleece. Pin in place, right-sides together.
33. Stitch around the top (1/2" seam allowance).
34. Here is the laptop sleeve after you have stitched around the top.
35. Now pull the exterior fabric back through the hole you left open in the fleece.
36. Turn the fleece right-side out as well.
37. Here is the hole that was left open in the bottom of the fleece lining.
38. Close the hole by slip-stitching it closed by hand.
39. This is the lining completely closed. Tuck the lining into the exterior fabric. Work the corners from the interior and exterior fabric into one another.
40. Top-stitch around the top opening. Use a coordinating thread (1/2" seam allowance).
41. If you would like to sew on your personal clothing label, do so at this time. I placed mine on the back-side in between the two straps.
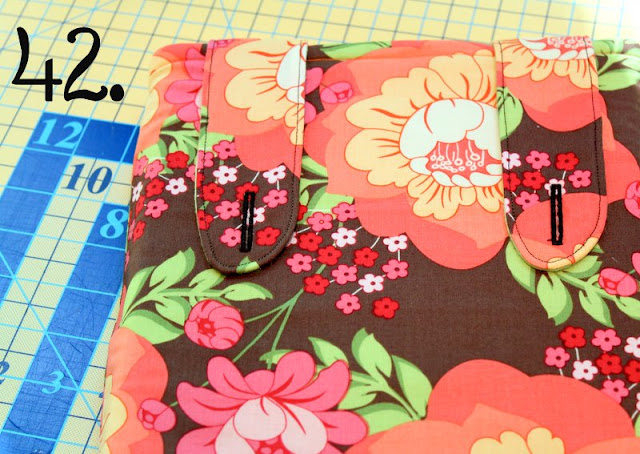
42. Fold over both straps.
43. Using a fabric marking pen, chalk or pencil, mark your button placement. Stitch by machine or hand-sew buttons into place.
Slide your laptop into the sleeve, button the straps and you will be toting your laptop in complete and ultimate style!


0 comments:
Post a Comment