


My wonderful friend and next-door neighbor had a beautiful baby boy recently. Today I thought I’d share the beautiful nursery she created for him. We had lots of fun running back and forth sharing opinions and ideas for this fun room in the months before he was born! <sigh> Helping on a dedicated nursery like this makes me feel cheated that I didn’t get to do this for any of my six children!
The nursery walls were painted a soft gray, and she chose to use aqua and red for the main accent colors.
We spent probably two hours arranging and rearranging the elements for the gallery wall. The two gears are not “real”—I think she got them at Hobby Lobby, but they’re much lighter than the real thing! The rusty lock and key is a real railroad heirloom, though.
This was my main contribution to the nursery! She wanted a sign reminiscent of an old-time train logo, and this is what we came up with. The cupboard door I used had already been painted aqua, so I used the vaseline trick before the coat of red paint so you could see the aqua underneath.
The old train on the shelf is a family treasure, as are the wonderful old lanterns. The old fan was a “treasure” un-earthed from my garage!
My friend has a very talented seamstress aunt who made a new cover for the glider rocker. I need an aunt like that!
And this is baby Buchanan. I like to cuddle him under my chin and revel in that fuzzy baby head!

Buchanan’s Nursery


Poison Control
I have to admit it—Halloween is growing on me. Two years ago I put up a few small decorations in a “nod” to Halloween—the first in something like 16 years of marriage! Last year, I put up a few more decorations. This year…well, of course I had to expand yet again!
I fell in love with Down to Earth Style’s mantel, which included a very, very cool vintage-style “Poison” sign.
I loved it.
It loved me.
I had to make one. THAT VERY DAY!
(Hers came from HomeGoods. I designed this one on my Silhouette.)

Of course, that was only the beginning of my temporary insanity…
I used the free Harry Potter Potions labels from Over the Big Moon to spookify my collection of old bottles…

…and a free printable book cover from chickabug to turn a hardback book into a magical tome…

…along with a couple of oil lamps and a creepy-crawly or two, I have an appropriately creepy Halloween display!

And can I tell you how much fun it was to play with the Halloween overlays and enhancements on PicMonkey?

Lots!

Poison…may cause death…or heartburn!

This sign is also available for purchase in my Etsy shop.
Beautiful Things (v 3.0)
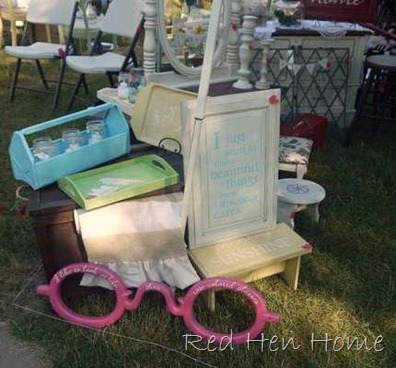
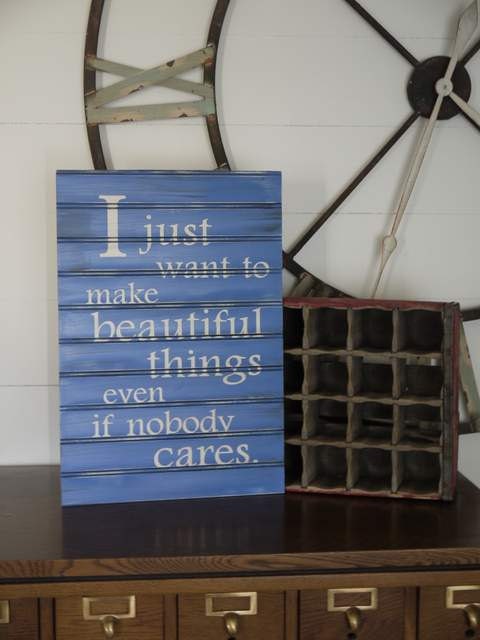
One of this week’s projects was to make a different version of my “beautiful things” sign. My first ever made a brief appearance at a vintage market last summer, and I was always a little sad that it sold!
The next version (on beadboard) was made for a market this summer…
…but my buyer wanted something more along the lines of my Bread & Pastries sign.

We had quite the debate over pink-and-white, pink-and-black, or black-and white…so we decided to use all three colors instead of choosing! The lettering is off-white, but the cupboard door was painted pink underneath the black, so it shows through with heavy distressing. Plus, there’s a pink swirl at the top just for fun!

I just love the sentiment, don’t you??
Two Signs
I love it when I receive pictures back of some of my signs or furniture in their new homes!
Suzanne of Wicked Faerie Queen was the winner of my two-year blogiversary giveaway!
She chose this little Apiary sign out of my Etsy shop.

She posted this picture on her blog:

Would you believe this sign is really YELLOW? Why is that color so hard for me to photograph??
Then a few weeks ago, Patti (the original recipient of a beadboard flag), ordered a sign as a gift for a friend. She had seen the quote “Never miss an opportunity to sleep on a screen porch” on a sign with a flower, but wanted me to put my own “spin” on it and add a black cat to suit her friend’s home.

This is what I came up with…and I have just as hard of a time photographing aqua as yellow ;-)

It was funny that the recipient had to track me down to find out WHICH of her friends named Patti the sign came from! I was happy to squeal.
She posted this picture on her blog:
Thanks for sharing, ladies!
Bread & Pastries…and Family!
This past weekend my family gathered for a niece’s wedding and a brief reunion. As part of our reunions, we always have a family raffle. Several people contribute items, and tickets are $1/each. The proceeds go to help defray expenses for the next reunion.
This was my contribution this year. I had seen a similar sign a couple of months ago, and I wanted to recreate it.

Most of my family members are AMAZING cooks—especially of homemade bread! So it was perfect.

I used a recycled cupboard door for mine, with a little bit of a crackle finish and lots of distressing to make it look like it had been around since grandma was doing the baking!

This went home with another of my newly-wedded nieces! It couldn’t have been more perfect—she and her new husband actually do love to bake together!
Two Years & a Giveaway!
Two years ago my daughter pushed me to stop drooling over other people’s blogs, and start contributing to my own!
So I did!
It didn’t stop the drooling…but it gave me a constructive outlet for my own projects!
Not only has blogging proved to be another great time-waster (like I needed another??), but has also inspired my creativity and encouraged me to learn new skills (like power tools!).
I’d like to say THANK YOU to all of you who make blogging worthwhile through your
kind comments,
genuine praise,
helpful suggestions,
and gentle good humor.
I feel blessed by the “virtual friends” I have made over the last two years, and I look forward to getting to know more of you!
Now for the important part:
To celebrate two years, I will be giving one reader a FREE 24” x 8” beadboard sign of their choice, OR a $20 credit toward any other item in my etsy store.
TO ENTER
Leave a comment telling me of a favorite past project.
That’s it! Giveaway will end Friday, July 20.
If you don’t want to wait…use coupon code TWOYEARS for 10% off any item in my etsy shop! Code valid through Friday, July 20.
Hope is the thing with feathers…
I have so many things to blog about that it’s overwhelming! There are furniture projects, home projects, my first building project, sewing projects, not to mention an entire WORKSHOP…
…but all those projects have worn me out

So for now, I will leave you with a favorite quote. My sister requested this a few months ago in “Tiffany blue,” and I have made two more versions since then in coral (or tangerine?) and aqua.

“Hope is the thing with feathers
that perches in the soul
And sings the tune without the words
And never stops at all.”
~Emily Dickinson

You can see a little bit in the picture below that the bird, the birdcage, and the words “hope, feathers, soul, sings, and never stops” are all highlighted with clear glitter. Glitter makes everything better!

Linking up here:
Where Liberty Dwells
And now…for the REST of the story!
If you’ve stuck with me this long, you now know how one wrecked beadboard flag has been turned into multiple smaller projects!
First there was the patriotic bunting, then the large Old Glory sign.
The next sign is probably my favorite! I took a five-stripe section out of the middle of the flag and painted a Benjamin Franklin quote on it that I came across on Pinterest (where else?):
Where Liberty dwells, there is my country.

The lettering is all in navy blue, outlined in white. For the word “Liberty,” I painted over the letters in clear glitter to give it some sparkle!

At the moment I am enjoying it on my buffet, but it will go with me to the Whitaker Museum Flea Market on June 16th.

In the picture below, you can see a small “Glory” sign that was made out of the final scraps of the flag. Actually—it is the reason the whole flag couldn’t be re-painted? Let this be a lesson to you…NEVER cut off 6 inches of your flag until you’re sure you have the measurements right!

I’m curious…which version of my buffet do you like better?
******************************************
Linking up here:
Old Glory
Here’s “part 2” of the flag rehab projects (you can see part 1 here), and now you can see what the error was! Although I had carefully looked up proper flag proportions (of course there’s a website for that! You can find it here), when I got down to the actual painting, the information flew out of my mind!
The blue field of stars is *supposed* to be 7 stripes tall…mine was painted at five. I thought it looked a little squishy, but what do I know?? Well, not enough, apparently!
Some of you may be asking, “Why didn’t you just repaint it?” Well, another project will reveal that answer!
I hated to waste all my careful not-so-careful painting, so I used the top five rows of the flag for a beadboard sign:

And you can’t tell it in the picture, but all those white stars got dressed up with a little glitter


So there you go…more lemonade from that lemon of a flag!
******************************************
Linking up here:
Wedding Signs
A bride-to-be contacted me about making one of my “Happily Ever After” signs for her December wedding, and I was happy to oblige.

She wanted it to look really old and rustic, so for the first time I did not use an old cupboard door for this sign. Instead, I bought a piece of rough plywood that was knotty, uneven, and splinter-y! (I sanded the splinters off. Or they came off in my fingers. A little of both happened.)
I also made a “coordinating” sign for a display of family wedding pictures (what a fun idea!)…

…plus one for the hot chocolate table…

…and a couple more for other “stations” at the reception. (I love the big knothole in the middle of the “Gifts” sign.)

It was my first time making a whole wedding collection!

I guess it’s good practice for when my children start getting married off…hopefully that’s a few years away for me!
Linking up here:
|
|
| Center of Attention Deficit Disorder | The DIY Show Off |
| Sassafras Salvation |
Beadboard Postcard
I made several of my beadboard signs for a woman in California recently, and she threw a challenge my way. She wanted to know if I could paint the design from my Postcard Table…

…onto beadboard as well. For me, smaller designs are much more difficult to reproduce neatly. I think my hand gets shakier the more exact I try to be!
I think this one turned out well, though. The final “sign” was 18” wide by 11” tall, in order to keep the proportions correct. I gave the beadboard a heavily distressed, crackle-y finish, and glazed it in three colors to give the appearance of much weathering.

It was a fun challenge!

Hmmm…I wonder how the French Chocolate table would translate to beadboard??
Signs of the times…
Things have been pretty quiet at the Red Hen Home lately (that’s not a bad thing). It’s still too cold here to do any big furniture painting, so I’ve been keeping busy with a few signs!
At least…that’s what I do when I’m not reading or eating Valentine cookies…
Here are a few samples of what I’ve accomplished over the last few days…


The discussions for future “in-home” projects are commencing! Hope to begin work on some changes for my long-neglected front room (it’s only been empty since August!) soon, and figure out what to do with my poorly planned laundry room!
Happily Ever After
One of my “virtual friends” noted that I have been a little MIA lately…sorry about that! My furniture projects tend to slack off in the winter months; it’s just too cold to paint outside! And then sometimes…life happens. Last weekend I got a nasty bout of strep throat, and then, being the caring, sharing person that I am…I proceeded to pass it along to two of my boys and my husband! Then my daughter tripped going UP the stairs at her school and gave herself a nasty sprained ankle, so she is in a boot and on crutches for the next few weeks. Whew! It’s been quite a week!
But I do have a project to share!
I had a niece who was getting married in December (yes, it already happened), and I made a simple copy of a beautiful wedding sign I had seen on etsy (note: the link to the original sign has been removed at the creator's request).
Using another of my salvaged cupboard doors (you can see other cupboard door projects here, here, and here), I base-coated the door black, then used my Silhouette to cut vinyl out for the words (those are the blue letters you see).
I brushed plain white glue on the board, and let it dry for a few minutes until it was just tacky.

(Note: you can also use a purchased crackle medium for this step, and to be honest—I think it works better. It’s not that expensive—especially if you “borrow” it from a friend! But use what you have on hand. Or what your friends have on hand.)Then I painted a creamy white paint over the board, sticky glue, vinyl letters, and all! While the paint was still wet, I removed the vinyl.

You can see that the edges are a little rough, but that can be cleaned up with paint later if necessary. However, since the board will also get sanded and glazed, it’s not really a big deal!

The crackle finish takes a while to really show itself, but it’s so cool when it does!

At my niece’s wedding reception, the sign was displayed on a large floor easel right outside the door. It was super cute!


