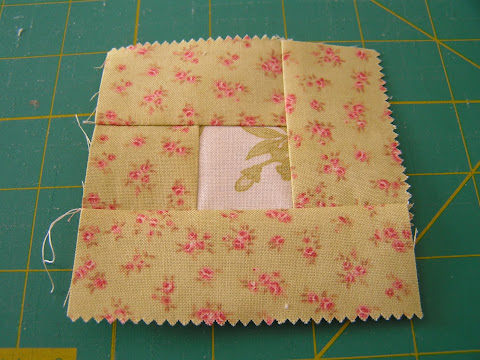
If you have been reading my blog for a long time, you might remember this picture and the post...
I went back and checked the date, and it was posted on November 4th 2009! Oh…my…gosh…, it was such a long time ago. The post was a sneak preview for the quilt I was working on and I meant to post the finished quilt soon. I am so sorry that you guys had to wait for over a year!!
The problem was I just could not decide how I wanted to finish the quilt. I pieced the quilt top right away and while I was busy working on other things, I kept thinking about what to do.
It's been so long, but I put together a quick tutorial for this quilt. I hope you will enjoy it. :)
Finished size 27" X 30" (it is constructed with 90 3"X3" squares)
{You will need}
I used Honey Buns from Moda, but you can make your own 1 1/2" wide strips by the width of the fabric and use them instead. I also used 6 strips for another project first, so I had 36 strips to make this quilt.
{How to}
1. Sort them and group by color.
2. From light color fabrics cut 90 pieces of 1 1/2" X 1 1/2" squares.
From darker color strips cut;
90 pieces of 1 1/2" X 1 1/2" squares
90 pieces of 1 1/2" X 3 1/2" rectangles
180 pieces of 1 1/2" X 2 1/2" rectangles
My Honey Buns had three main colors: pink, green, and blue. Since I made this quilt with 90 blocks, I made 30 pink blocks, 30 green blocks, and 30 blue blocks. When you are making this from scratch, this will make it easier to pick out the fabrics. You only need four different color schemes, one light, three darks.
3. Piece them together to make blocks. Use the pictures as a guide. Don't forget to press the seam after each step. It will make quite a difference on the finished quilt.
4. Lay all the blocks to see how you want to piece them. Then, piece the blocks side by side first.
5. Then, piece all the strips row by row.
It took me over a year to decide how I wanted to finish the quilt...Here is how I did it. Since I made this for Rachel's room, I appliqued her initial "R" and added small pom-poms around the edge. You will be proud of me (little squeak!) I machine quilted this myself!
Rachel was so excited to see the quilt finished and hanging in her room. It took me long enough, but it's finally finished! :)
Tutorial ~ Square in Square Quilt ~
Subscribe to:
Post Comments (Atom)


0 comments:
Post a Comment